
Thanks to Hugh Richards, Head of History at Huntington School and course leader of the HA’s Subject Leader Development Programme, for this blogpost. In it Hugh walks us through the process of planning a GCSE History Unit. From that he draws out GCSE planning principles. This blogpost is useful for anyone also planning GCSE units and to discuss in departmental CPD.
I have recently planned a GCSE unit from the ground up – it wasn’t working well for us so it needed a re-plan in full. This blog outlines some of the pedagogical tools and thinking around curricular implementation that could underpin a GCSE unit. The examples in this blog are drawn from a unit on the OCR B Schools History Project: ‘The Making of America, 1789-1900.’ but I have tried to extract principles that would work for any unit.
1. Get the long-term planning right.
The lesson allocation for the unit might have been done. If not: total up the course lessons, take off 5% for all the disruptions of school life and a bit of slack here and there, and you have your total lessons. Take about 10% of that for revision, and divide up the rest of the lessons based on weighting in the final exams. That will give you the actual number of lessons available for the unit you’re planning.
Stick to this number of lessons. Budget time for assessment, end of unit tests, DIRT. No unit should take longer to teach than the share of the course it represents, unless you have a unit that naturally seems to take less time than it should.
2. Use the specification to organise short sequences of lessons
One long story of 25-30 lessons will lose its focus and threads. So, divide it up. It’s important to use the specification as the framework here, because this is the way the exam is likely to be organised, and date ranges in questions are likely to be drawn from. This is most important for students with lower starting points.
You can then draft questions to govern these sequences of lessons, although this might differ from a KS3 Enquiry as you might not answer the EQ at the end of the sequence of lessons, especially as you will need to find time for exam practice.
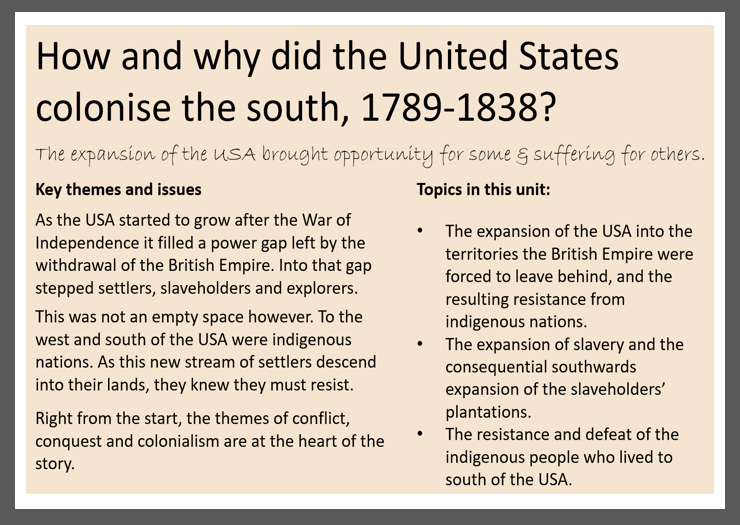
For this course, the narrative does bleed across the divides, but the divides are used in exam questions. So, to make a fuss of each of my short sections, I developed section headers to help students see the (sometimes quite arbitrary) divisions. They also are a chance to build curiosity and reflect on where we have got to so far.

3. However, don’t be completely constrained by the specification
The first image is what the spec says, expressed as textbook chapters. The second is an overview of how I have organised it. Note that we start the story with the indigenous peoples, who the specification first introduces fully at the start of unit 3. There is often scope to add different characters or case studies, to broaden and diversify the specification core. In this case I have:
Re-framed to start with the indigenous people, and frame white Americans as arriving into this world.
Changed the questions to focus on this story as a deliberate process of colonisation, rather than a pre-destined outcome.


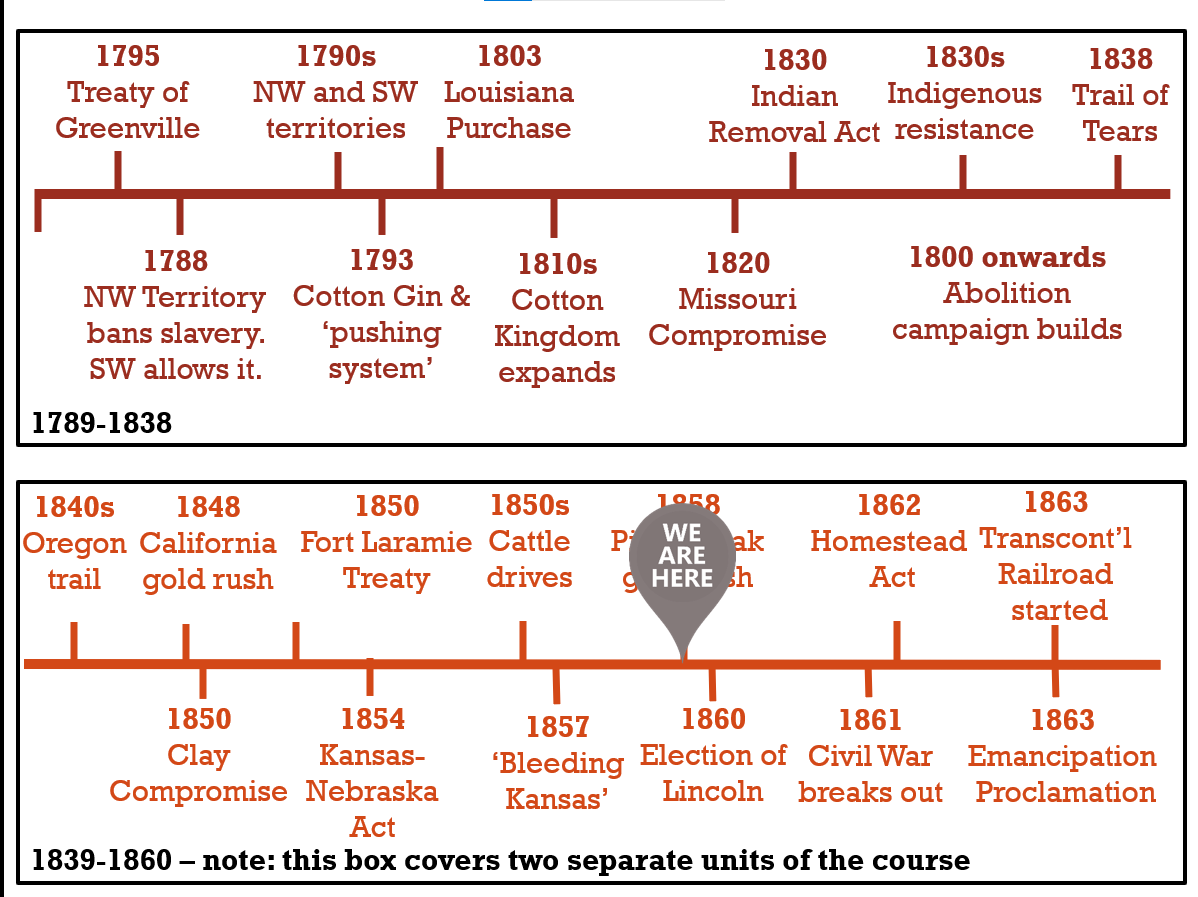
4. Timelines are helpful: select carefully and organise well.
This is the time to be really selective. Which 20 or so events or dates matter? Maybe 25 at a maximum? Which dates do they really need to know?
Once you have selected them, organise them well. Avoid symbols on timelines – although colour codes can work well to pick out themes – but generally, keep the focus and attention on the dates. very minimal –
Again, show the breaks in the course somehow. Dividing the line as I have, or using boxes to show the periodisation, works well.
5. Textbooks do matter, but so does how you use them.
We read a challenging textbook as a whole class, a whole page spread at a time, before starting any note-taking task.
This helps students get a sense of the whole thing, so they can selectively note take rather than copy every line. It’s also great prep for A-level where they will need to replicate this skill for many homeworks.

6. Move beyond the textbook – but make sure the thinking replaces (or at most overlaps) rather than ‘adds on’
Graphics, maps, documentaries, scholarship extracts all help, but don’t do this on top of reading that section of the textbook. Instead, isolate the bit of the textbook that your other resource duplicates and don’t use that section. Guide students through scholarship reading and documentary watching, to ensure they lift what they need to from it:


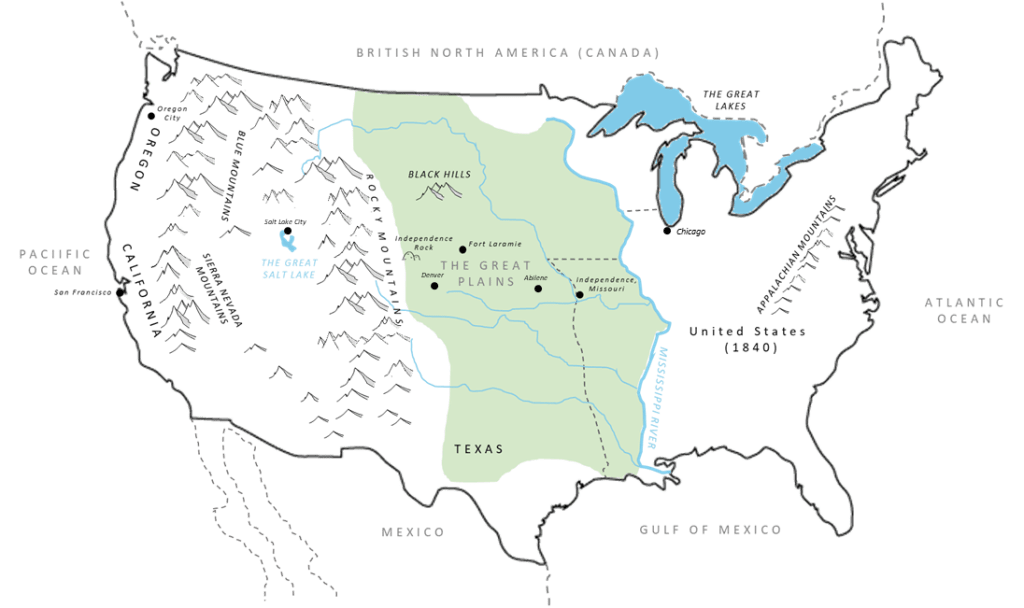
Maps are hugely important- see Mike Hill’s superb article Curating the imagined past: world building in the history curriculum in Teaching History 180. Sometimes tracing a map and only using the bits of a map you want is quicker than endless Google scrolling! The example below from Greg Thornton (@MrThorntonteach) is superb. It highlights just the details that will be relevant to the course.
The map below does the opposite – layers in complexity and diversity. The digital version is here (https://native-land.ca/) and it can be helpfully scrolled and zoomed in front of the students.

7. A summary of core knowledge is helpful, but keep it as a story
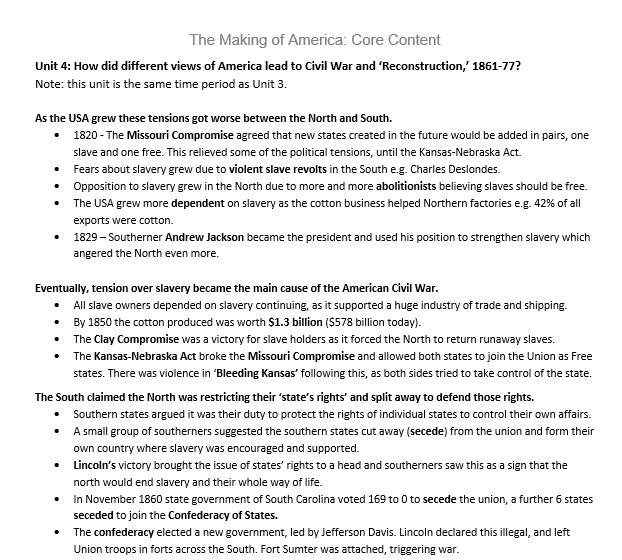
Don’t atomise into the black and white grids. These “knowledge organisers” do little, I would argue, to solidify students’ understanding of the core historical narrative, or of causal relationships, or significant changes within the story. Our ‘core content documents’ are broken into one page per chapter (reduced from a 100 page textbook), with 4-5 sets of bullets per page. The key vocabulary is in bold, but used in context rather than atomised as a list. Each set of bullet points is preceded by a judgment in bold. This format was introduced to me by Rich Kennett (@richkbristol) and it has genuinely been a game changer:
Writing them made us as a teaching team think really hard about the most crucial things we wanted students to know.
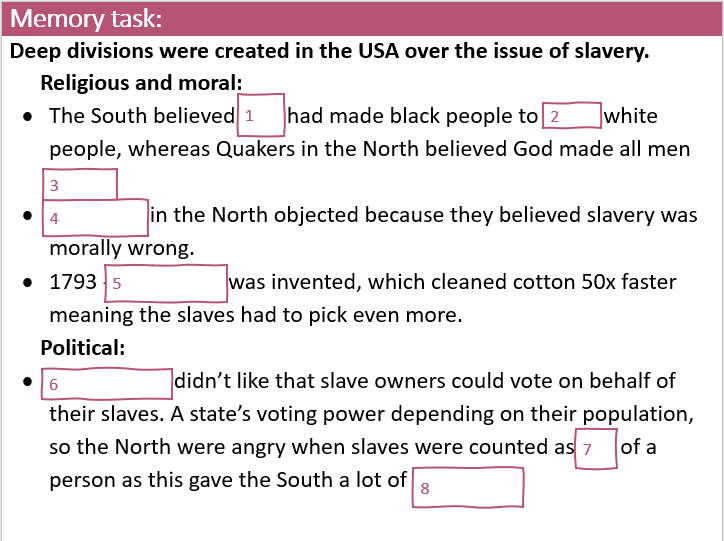
They’re really useful for quick retrieval at the start of lessons, like this word-fill or a verbal quiz. Running through the answers efficiently doubles up as a “story so far” for that lesson.
They’re also brilliant for people who miss lessons – they can read the bullets from the previous as their starter, instead of the memory task, and access the lesson they have come to. They can then catch up fully afterwards.
Finally, they are clearly very helpful for revision in all kinds of ways- as a guide for cue cards, a basis for parents to quiz students and so on.
Here is a snapshot of one:
8. If there are common threads you want them to pick up, consider consistent graphics
These are sometimes factors, themes or time periods. You can use these badges to help them keep track and draw connections across the course.
They also form a rough-and-ready heuristic for students who struggle to arrive at a structure for written answers- a sort of checklist to help them organise their thinking. It’s rarely totally nailed down by such factors, but it helps start thought processes. For this course there is an emphasis on cause and consequence, and so these factors often (but not always) help students arrive at a well-structured answer to a question. Students are able to think “Which of these 6 things apply in this instance?” rather than, “What do I know about this topic?” This enables their thinking to be structured and, in my experience, this helps them organise answers on paper.
These graphics are designed at the start and used as badges to help students spot them at work. As the course continues, students use them to think about a given section of the narrative- “Which of the six are having an impact here?”
Again, please note the terminology remains consistent with the exam board.

9. Weave exam questions into the course – where they fit nicely into the curriculum rather than at set intervals.
Exam question practice does matter. But they don’t have to sit at the end of a section of the specification. They can be better fitted into the curricular delivery when they are used in relation to questions and topics which suit them.
If you haven’t read Making Good Progress (2015) by Daisy Christodoulou, you really should. I rarely recommend ‘edu-books’ but this one is transformational. The key aspect here is to ‘deliberately practice’ distinct elements or stages of writing an extended answer rather than ‘naïvely practicing’ by writing out full answer after full answer. In lessons, this means discussing plenty of exam questions, but using a mixed diet of the following to vary which element of answering you work on:
Little plans of how it would be organised into paragraphs. Discuss the strengths and weaknesses of several plans as a class.
“Ten words we would see in this answer” – this allows all the discussion without the writing out.
Bleep tests using YouTube interval timers to help them get a sense of what speed they need to work at and how much they can do if they motor along.
Build to independently practiced questions, prioritising quality of feedback over quantity.
Do end the unit with multiple unseen questions in exam conditions – essential for timing practice and self-regulation.
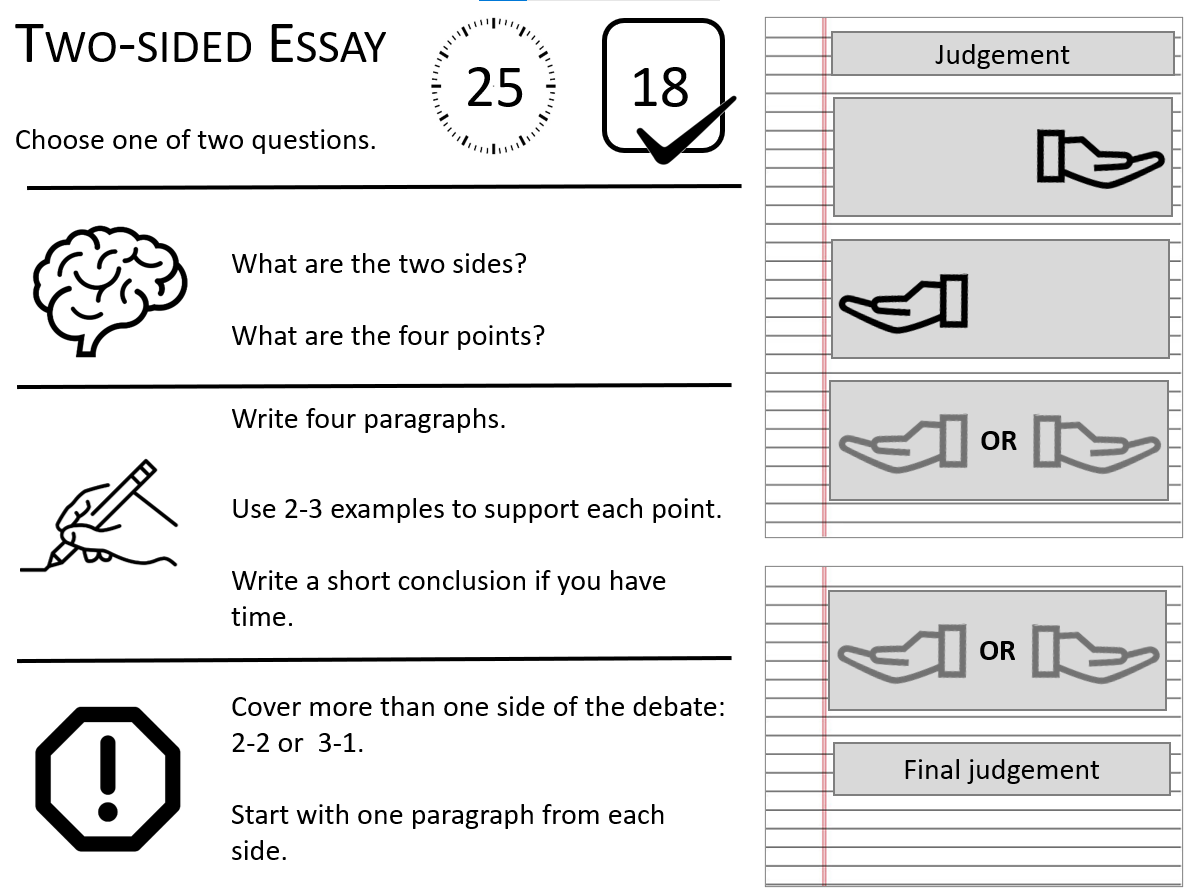
Make the instructions really clear, and ideally include a visual layout so students know roughly what they are aiming for. This is helpful with timing and self-regulation in the exam. Ours look like this:

These are the major things I look to do when planning an exam unit, but I know there are lots of other approaches out there- it might be really helpful for ECTs and new HoDs if others were able to share how their approach varies from this.

One thought on “Curricular implementation at Key Stage 4: Anatomy of a GCSE History Unit.”